
Upgrade Ambari Server
Follow the steps below to upgrade the Ambari server.
Stop Infra-solr Service
Stop the Infra-solr Service from Ambari-UI.
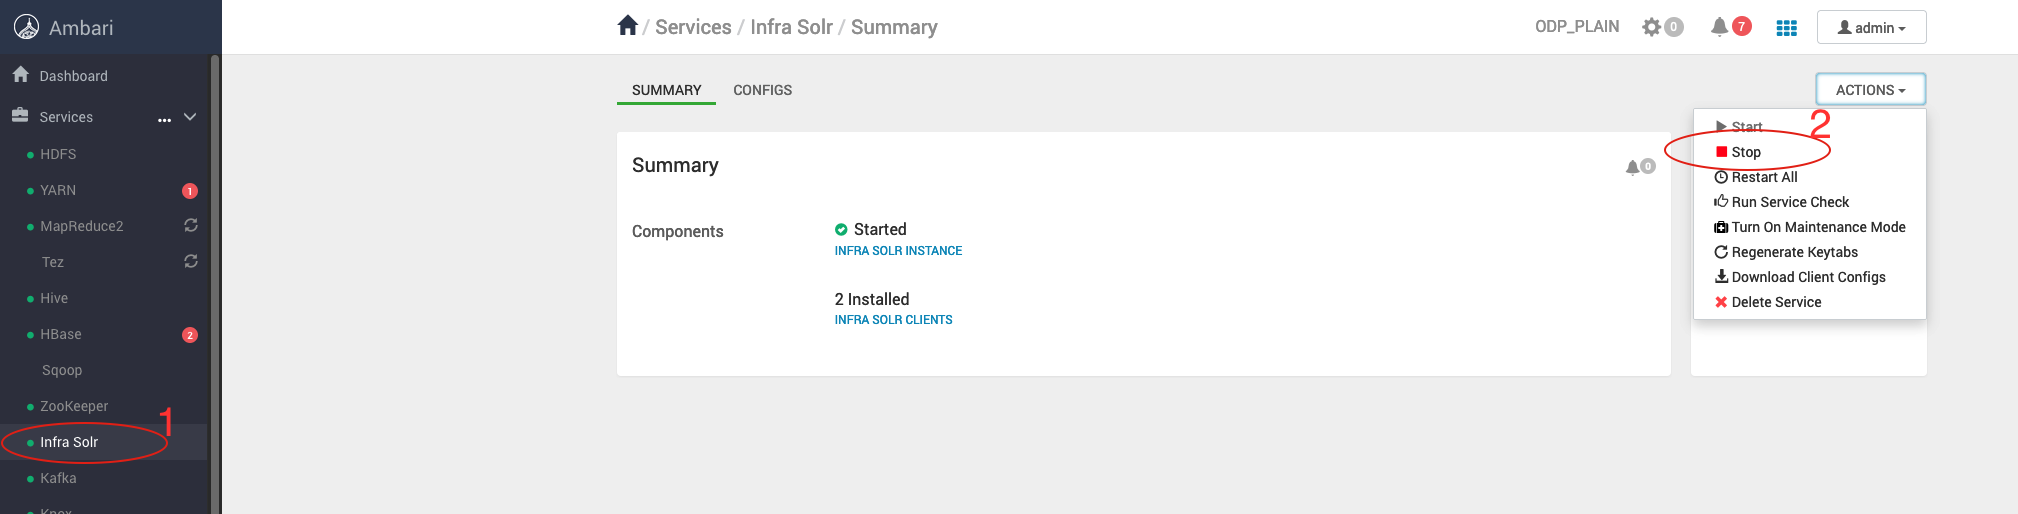
Stop Ambari Server and Agents
Stop Ambari Server
Info
Take the backup of ambari-server configs.
/etc/ambari-serfver/conf/
ambari-server stop
Stop Agents
Stop Ambari-agent on every cluster node.
ambari-agent stop
Back up Ambari Database
Take the Ambari-server backend database backup from the server host.
DB Backup Commands
mkdir /tmp/ambari-server_db_bckp
mysqldump --databases ambari > /tmp/ambari-server_db_bckp/ambari_mysql_bckp.sql
The upgraded version Ambari-2.7.8.6-3 supports only Python 3. Please ensure Python 3 is installed and configured on all cluster nodes before proceeding with the upgrade.
Verify the Python Version
python -V
Response: Python 3.x.x.
Add Ambari Repo on Cluster Nodes
Back up the Old Ambari Repository
mv /etc/yum.repos.d/ambari.repo /tmp/
Retrieve the latest Ambari repository details from Accessing Acceldata Repositories and add it to all cluster nodes.
List the existing Ambari packages
On RHEL
rpm -qa | grep ambari
On Ubuntu
apt list ambari-*
Example Output (if the current Ambari version is 2.7.6.0-1):
ambari-infra-solr-2.7.6.0-1.noarch
ambari-agent-2.7.6.0-1.x86_64
ambari-server-2.7.6.0-1.x86_64
ambari-infra-solr-client-2.7.6.0-1.noarch
Remove the Existing Ambari Packages
- On the Ambari Server node, remove the installed packages before upgrading:
On RHEL:
yum remove ambari-server
On Ubuntu:
apt remove ambari-server
- On the Ambari agents node, remove the installed packages before upgrading:
On RHEL:
yum remove ambari-agent
On Ubuntu:
apt remove ambari-agent
- On the Ambariinfra-solrnode, remove the installed packages before upgrading:
On RHEL:
rpm -e --nodeps ambari-infra-solr-client ambari-infra-solr -y
On Ubuntu:
dpkg --remove --force-depends ambari-infra-solr-client ambari-infra-solr -y
- Adjust the package names based on the installed versions on each node.
- You can verify installed packages before removal using:
On RHEL
rpm -qa | grep ambari
On Ubuntu
apt list ambari-*
Make sure the Amabri packages are not installed.
Install Ambari packages
Install the latest Ambari-server only on ambari-server node.
Ambari Server Node
For RHEL:
yum clean all
yum install ambari-server -y
For Ubuntu:
apt clean
apt update
apt install ambari-server -y
Ambari Agent Node
For RHEL:
yum clean all
yum install ambari-agent -y
For Ubuntu:
apt clean
apt update
apt install ambari-agent -y
Infra-solr Nodes
For RHEL:
yum clean all
yum install ambari-infra-solr ambari-infra-solr-client -y
For Ubuntu:
apt clean
apt update
apt install ambari-infra-solr ambari-infra-solr-client-y
Ambari Server Configuration Files Restore
Restore the configuration files backed up at step 4 (Backup Taken in step 4).
Restore ambari.propertoies File
cp conf_12_02_25_16_52.save/ambari.properties conf/
When prompted, enter 'y' to confirm.
cp: overwrite 'conf/ambari.properties'? y
Restore passwd.dat File
cp /etc/ambari-server/conf_12_02_25_16_52.save/password.dat /etc/ambari-server/conf/password.dat
Java and JSVC upgrade
Set up Java 11 on all nodes
# Install Java 11 on ALL nodes
yum install -y java-11-openjdk java-11-openjdk-devel
# Configure Java 11 on ALL nodes
update-alternatives --config java
update-alternatives --config javac
Install JSVC
yum install bigtop-jsvc* -y
Ambari Server Schema Upgrade
Before upgrading, ensure a database backup has been taken (as mentioned in Step 6).
Update ambari.properies
# Update java homes with JDK 11
java.home=/usr/lib/jvm/java-11-openjdk
stack.java.home=/usr/lib/jvm/java-11-openjdk
Add new properties in ambari.properties
Info
In case of using Oracle 19C as Database, download ojdbc11.jar and update custom.oracle.jdbc.name in ambari.properties, also run:
cp ojdbc11.jar /var/lib/ambari-server/resources/
Run the Ambari Server upgrade command:
ambari-server upgrade -v
Response when prompted:
Ambari Server configured for MySQL. Confirm you have made a backup of the Ambari Server database [y/n] (n)? y
Enter 'y' to confirm.
After the successful completion, you must see the following message.
Ambari Server 'upgrade' completed successfully.
Start Ambari Server
ambari-server start
Start Ambari Agent
ambari-agent start
Once started, verify that the Ambari UI is accessible using the same URL as before.
Verify Ambari Version
Verify the upgraded Ambari version in admin->about on the top right corner in Ambari UI.
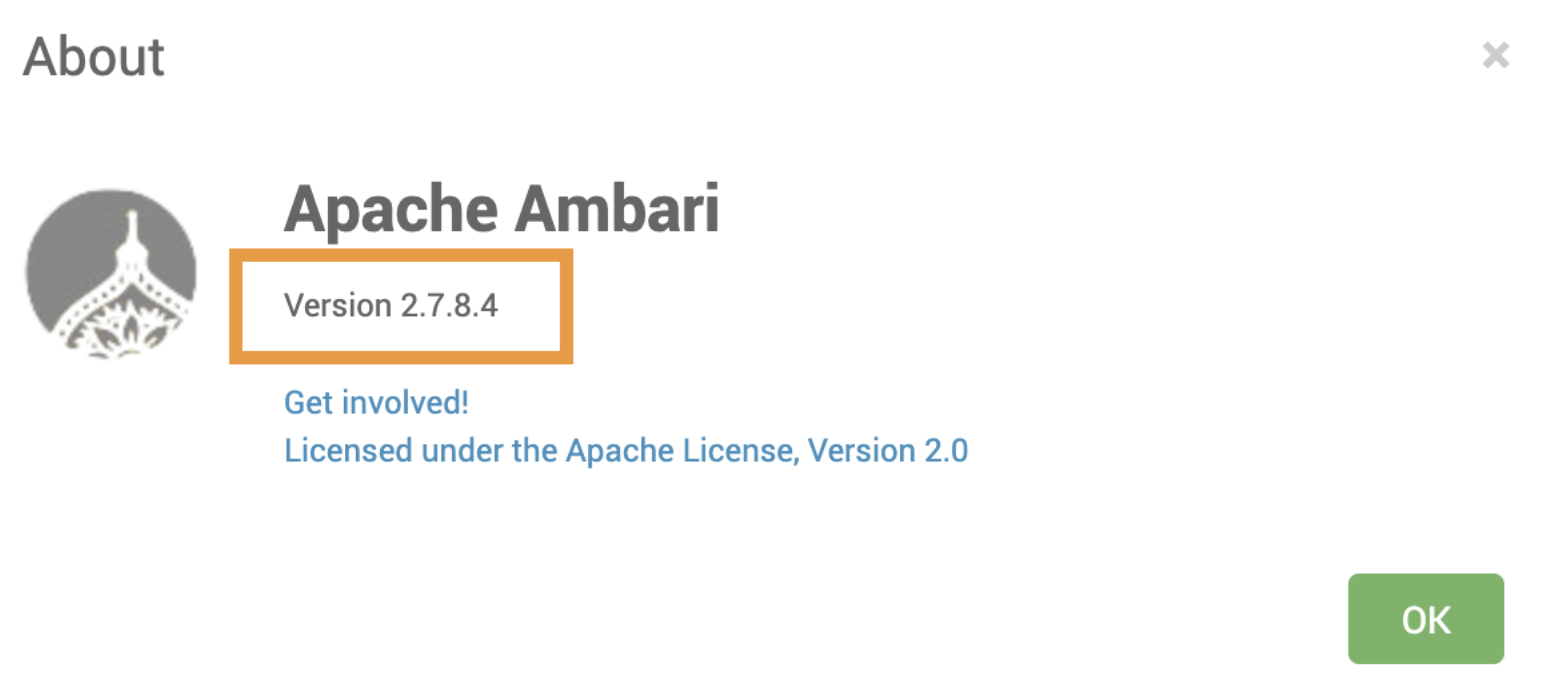
The Ambari version is upgraded successfully.